My coding setup
Introduction
As a machine-learning researcher, I spend a lot of time writing Python. In grad school, I worked mostly in Atom and Jupyter. I would prototype code and visualize results in notebooks while developing core code in Atom. While Atom has some useful features (syntax highlighting, autocomplete) for Python programming, it’s not as full-featured as an integrated development environment (IDE). At VL56, I started using PyCharm as a Python IDE, and I’ve gradually found a set-up that fits my needs and workflow.
What I want
This set-up is geared towards ML/computational biology research. On a daily basis, I
- Run code interactively to figure out how to do something or to visualize results.
- Train models on remote (AWS) machines with GPUs or much more compute/memory than is available locally.
- Contribute to custom, version-controlled libraries that are shared across people and projects.
As a result, I need to be able to
- Sync code and results between my local machine and one or more remote machines.
- Work interactively in Python on a remote machine, but with code completion.
- Be able to disconnect my local computer during long training runs without losing progress.
In order to accomplish these things, I set up SSH config files to make it easy to get into my remote instances, set up a remote interpreter and automatic file-syncing in PyCharm, and use Tmux for long-running jobs.
I assume here that you already have one or more remote instances set up with static IP addresses. I’ve always used AWS EC2 instances for remote compute, but obviously other options exist.
Setting up an SSH config
Typically, if we have a remote instance with IP a.b.c.d and a private key path/to/mykey.pem, we access it via the command $ ssh -i path/to/mykey.pem user@a.b.c.d. We can set up an OpenSSH config to avoid having to remember our keys and IP addresses. This config should go in ~/.ssh/config. Each stanza (entry) looks like
Host kky-p3
  Hostname a.b.c.d
  IdentityFile path/to/mykey.pem
  User ubuntu
Stanzas start with the Host directive and contain SSH arguments. Other arguments are possible, but these are the ones necessarily for the current usecase. Now, I can just use the host-name I’ve defined in the config to connect to this instance: $ ssh kky-p3.
A more detailed explanation of SSH configs and why you should use them can be found here.
Setting a remote interpreter in PyCharm
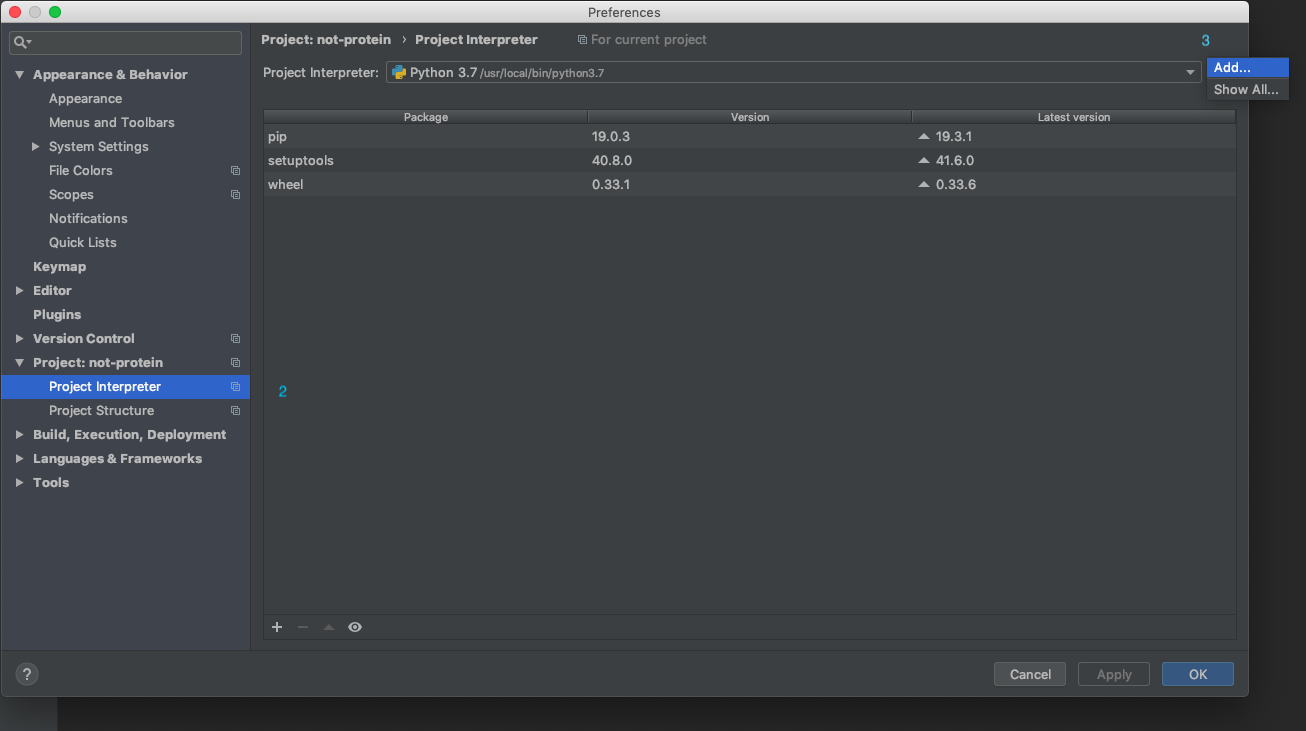
- Open the project for which you want a remote interpreter. Open preferences by hitting
⌘,. - On the left side of the preference pane, select
Project: project-name → Project Interpreter. -
Click the wheel in the top right and select
Add.
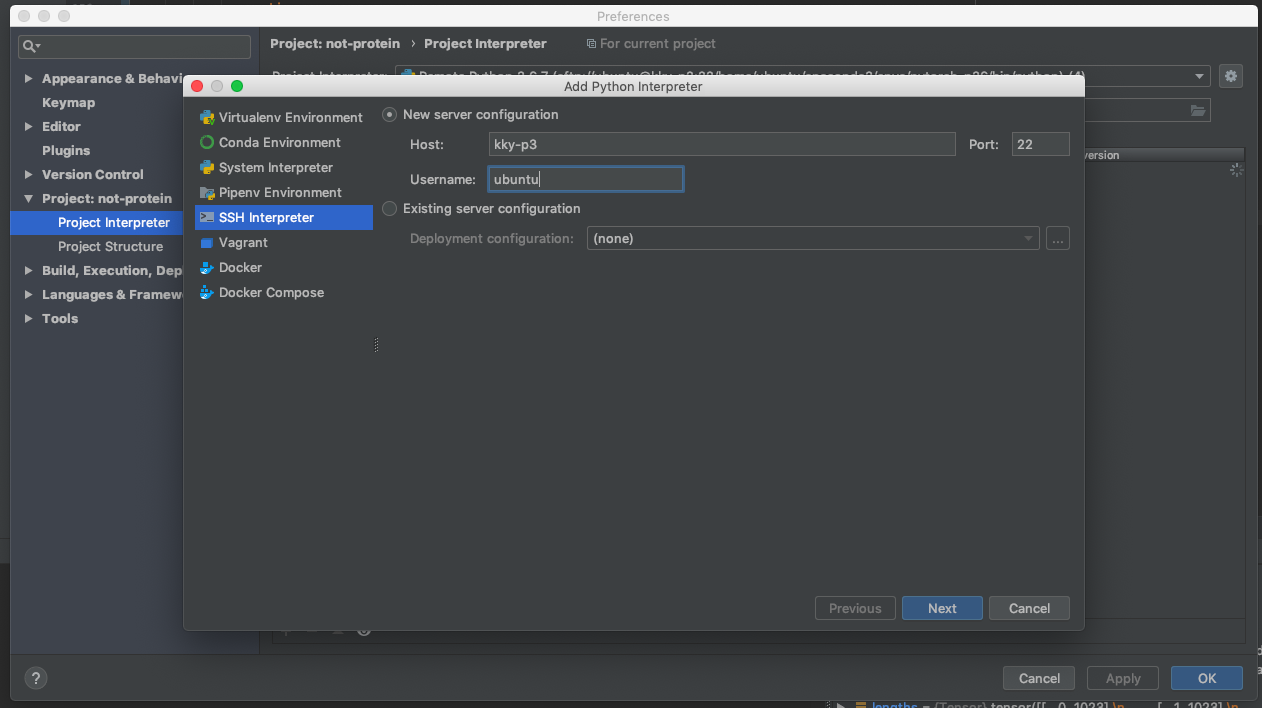
- On the left side, select
SSH Interpreterand then fill out theHostandUsernamefields.
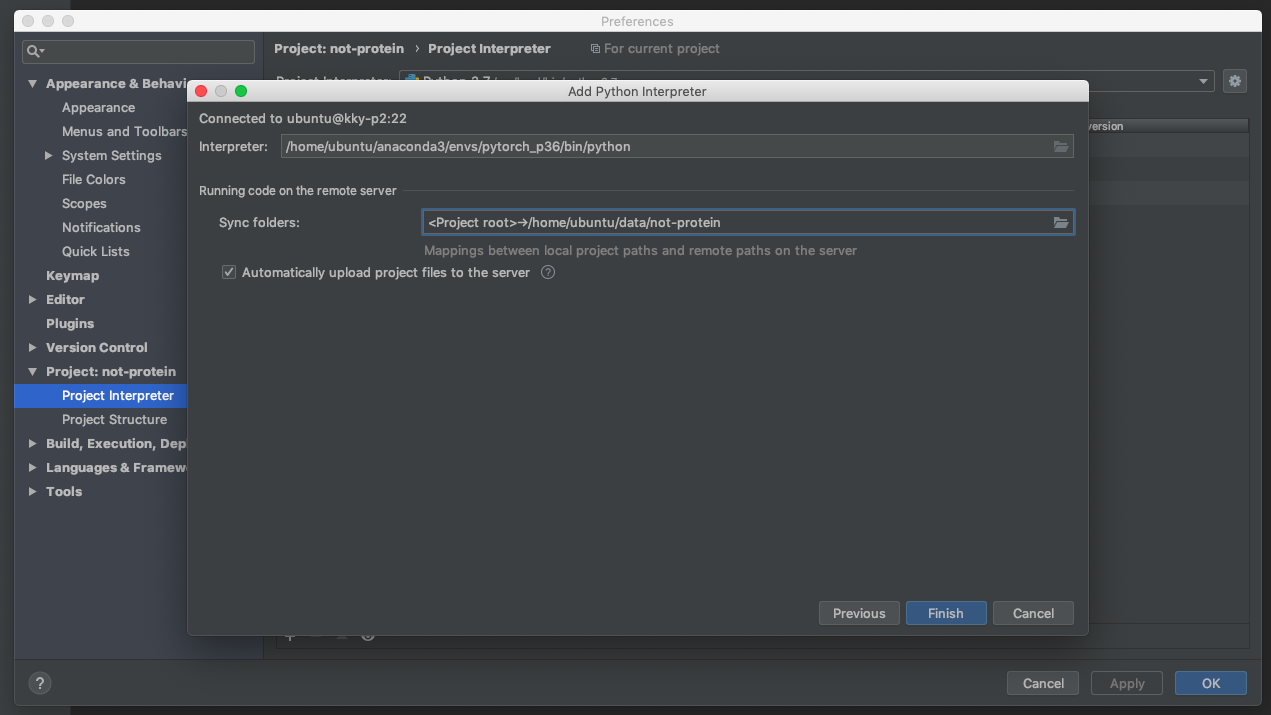
- Use the Folder icons to fill out the paths to the Python binary and the remote location where your project files should sync.
Now, when you start a new Python Console within the project, it should run on your remote instance in the environment you specified.
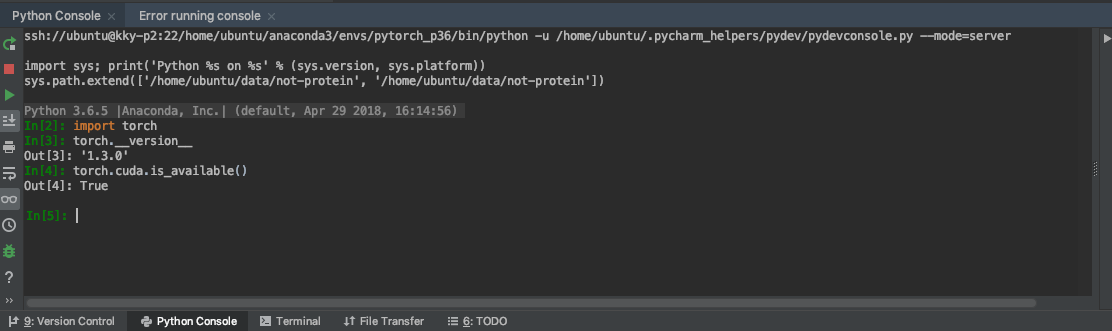
I used to do my prototyping in a Jupyter notebook, but nowadays I do most of it in the Python console within PyCharm. Sometimes I type directly into the console, but if I’m doing anything that requires more than 2 lines or so, I usually type it in the editor (often in the file I’m developing) and then use ⌥ shift e to send my code to the console. That command either sends all the highlighted code (with smart unindenting!), or, if no code is highlighted, it sends the current line.
Syncing files
When you set up a remote interpreter in PyCharm, the default is to automatically sync all changes in your project to the corresponding directory on the remote. If you need to add more syncs, go back to preferences (⌘,), and then
- Select
Build, Execution, Deployment → Deploymenton the left side, click the+to add a new destination, and select SFTP.
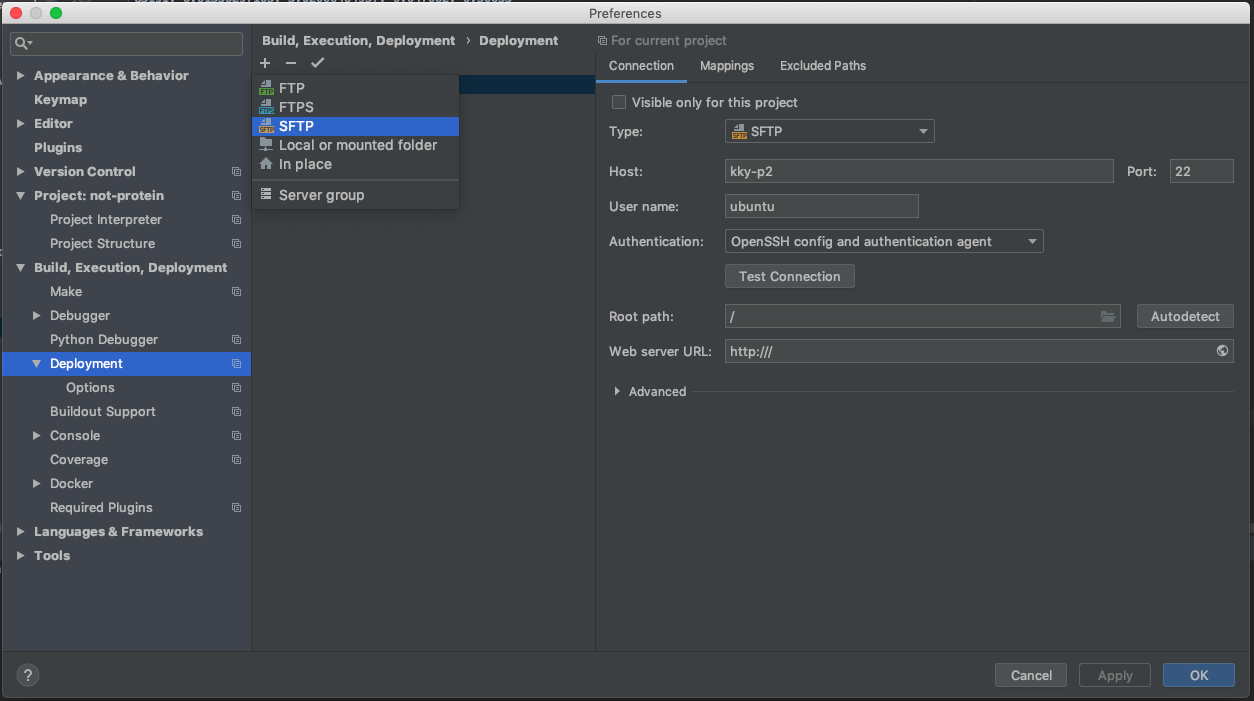
- In the
Connectiontab, fill out the hostname and username from your OpenSSH config file, and then select “OpenSSH config and authentication agent.”

- In the
Mappingstab, select where you want files to be synced.
If you have deployment targets that are not set to sync automatically, you can initiate a manual sync of selected files or directories with ⌘ ⌥ shift x. You can also download files from the remote by right clicking on selected files or directories and selecting Deployment → Download from...
tmux for long-running jobs
Running code in the PyCharm console is great for experimenting and prototyping, but that console dies whenever my connection to the remote is broken. This is obviously sub-optimal for long-running jobs, such as training machine-learning models. The solution is to connect directly to the remote using SSH and then to execute code in a terminal multiplexer. I use tmux, but Screen is another popular option. Both are installed by default in AWS Ubuntu-based AMIs.
- Connect to your remote in the terminal using
$ ssh host-name. $ tmuxstarts a new tmux session.- In your tmux session, do whatever you need to do to start your job. Your job will now continue running even if your ssh connection is closed.
- To return to the default shell, hold down
ctrlandbat the same time, then let go and pressd. - To access your tmux session again from the default shell (say, after restarting your ssh connection), enter
$ tmux attach -t 0
Some tips and commands:
- Each tmux session has a name. By default, they start from 0 and increment. If you want to specify a name when starting a session, use
$ tmux new -s myname - To detach from your current tmux session, hold down
ctrlandbat the same time, then let go and pressd. - To reattach a tmux session, use
$ tmux attach -t myname. $tmux lsshows the active sessions.- Within a session, you can split the window into multiple panes. Hold down
ctrlandbat the same time, let go, and then press%for a vertical split or"for a horizontal split. - You can navigate between panes by holding down
ctrlandbat the same time, letting go, and then using the arrow keys. - If you need to scroll up in a tmux session or pane, Hold down
ctrlandbat the same time, let go, and then press[. You can now scroll using the arrow keys. To exit scroll mode, hitq. - There’s a lot more tmux can do: see this cheat-sheet for more commands, or the tmux docs for all the capabilities.
Acknowledgments
Almost everything I know about PyCharm I learned from Andy Beam.